Sign documents automatically using Zapier
With Tallyfy, you can easily send a form to a client for signing once a step is completed in your process. By integrating with webhooks and eSignatures services like DocuSign or HelloSign, you can automate the process and make it more efficient.
In this example - we use a middleware system called Zapier, but you should note that this general idea should work with all kinds of other middleware systems like Power Automate, make.com, etc.
Create a zap to catch a webhook from Tallyfy
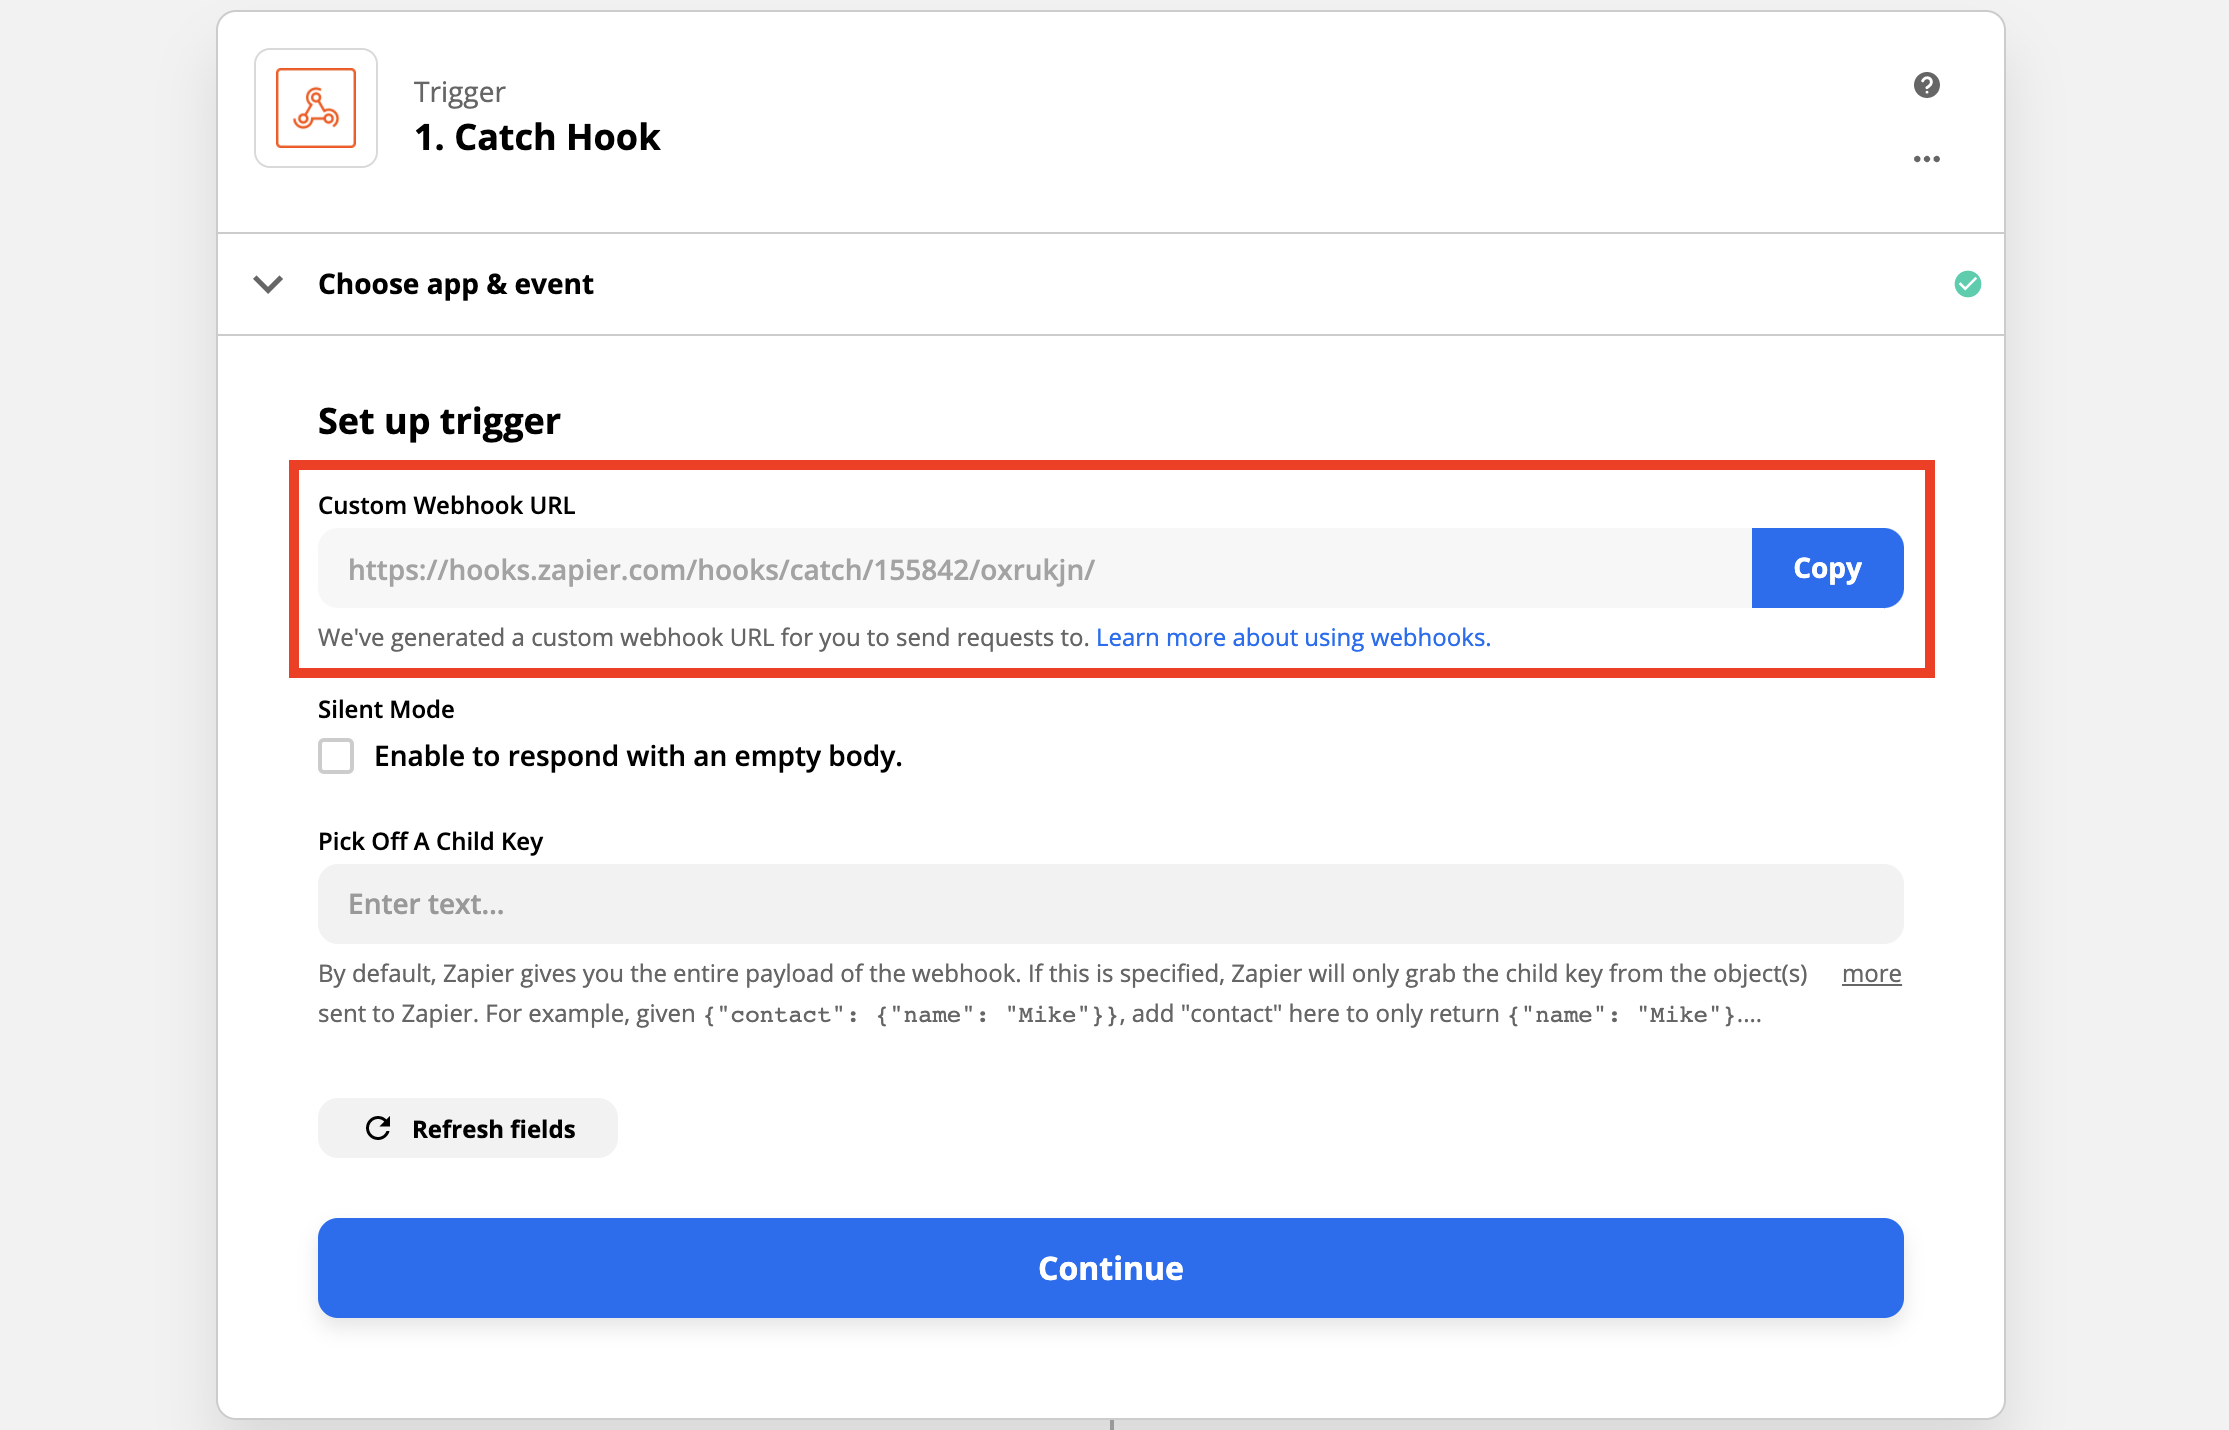
Firstly, we need to create a zap in Zapier with a “Catch Hook” trigger. Create a new Zap and choose “Webhooks by Zapier” under the app and event section. Set up a trigger and copy the webhook URL. You will be using it on the next step.
Launch your process in Tallyfy to trigger it
-
Review the form from HelloSign or DocuSign that you want to be signed. Note any fields on that need to be filled out - we will fill these out from Tallyfy.
-
In this example, we will use Tallyfy to collect customizable information about the client and send that information through the webhook, via our middleware - into a signable form.
-
First we need to create a procedure with all the customizable form fields you want to include in the signed form like client name and email. In the example below, we use a kickoff form to collect client information before the rest of the template begins. You can learn how to set up one here
-
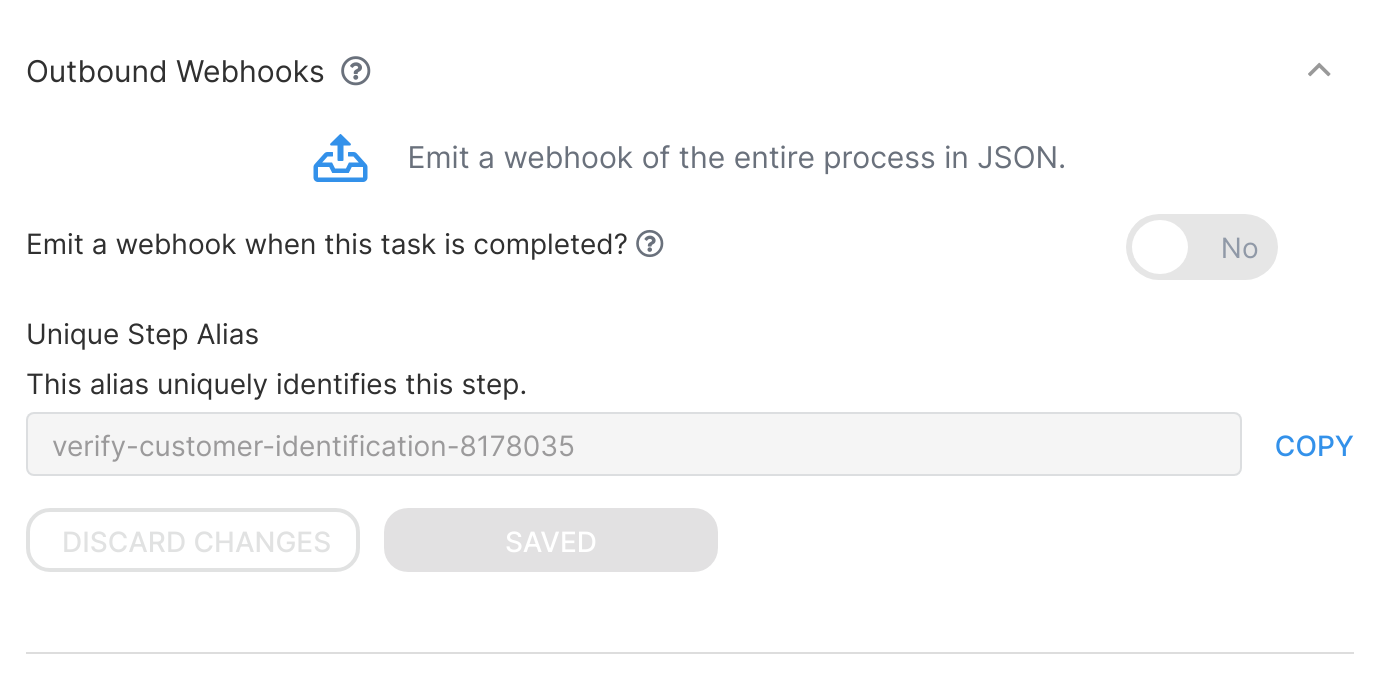
Next you’ll need to include the webhook from Zapier in one of the steps in your process. In the example below, it’s included as a separate step that, when completed - emits all the information already entered in the process to the endpoint URL you specified via the outbound webhook
- You need to send a test webhook to Zapier. Launch and compete your process with some test data, then return to Zapier and complete the “Test Trigger” to see the data you sent.
Link your HelloSign or DocuSign account to complete
For HelloSign
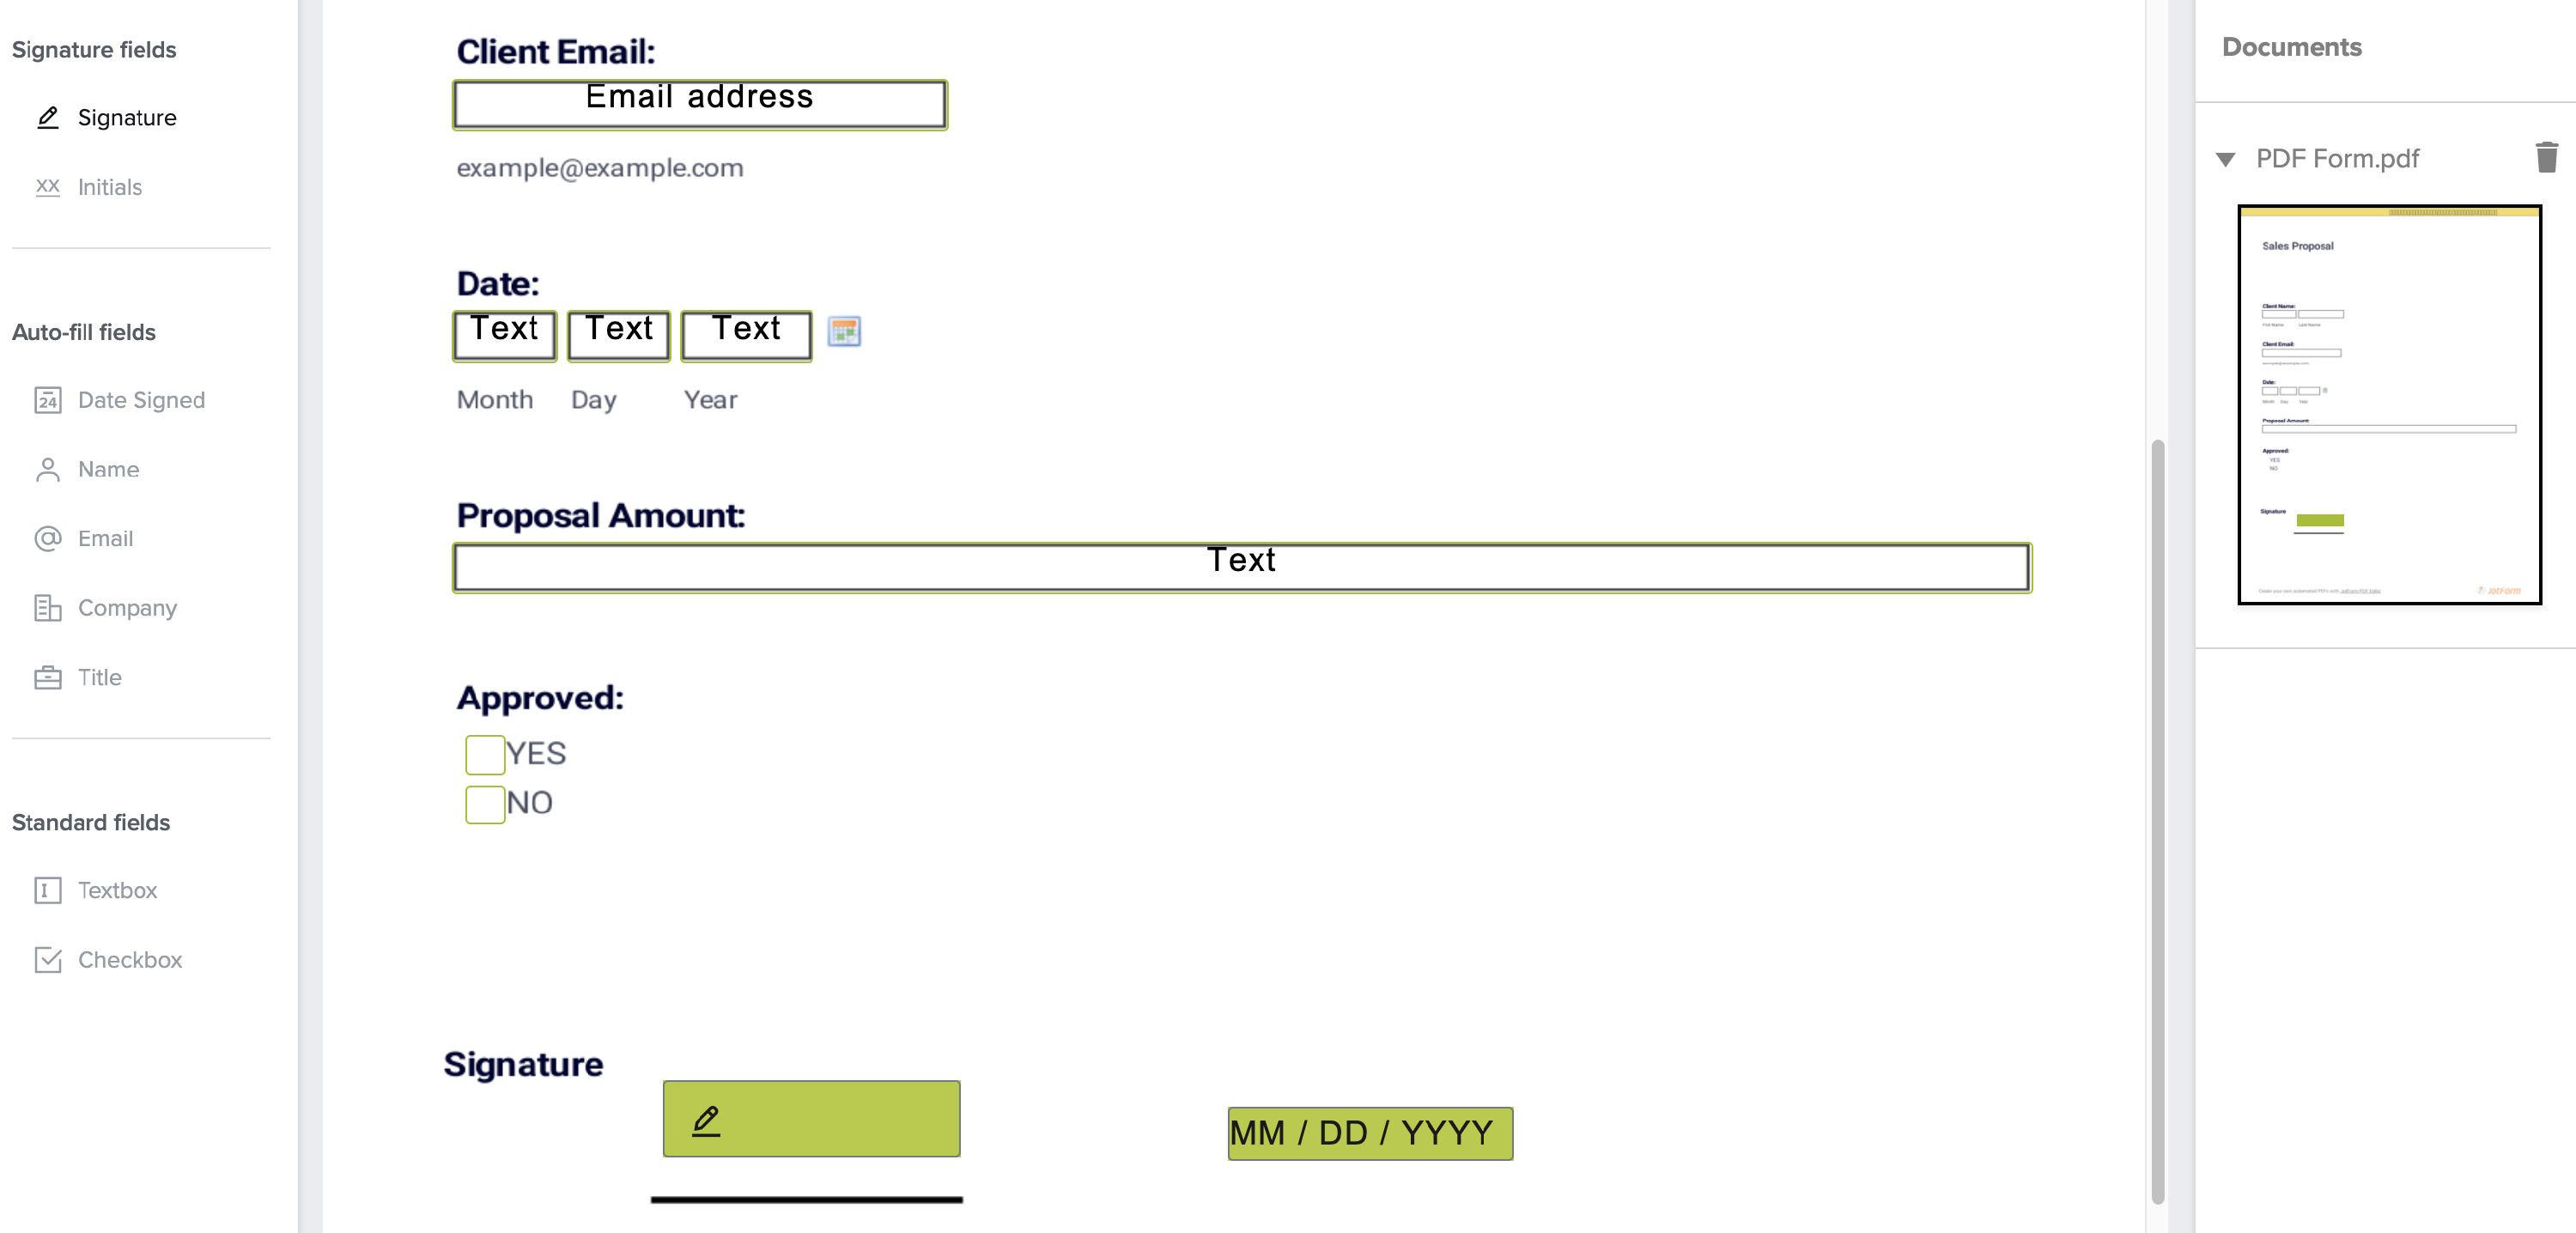
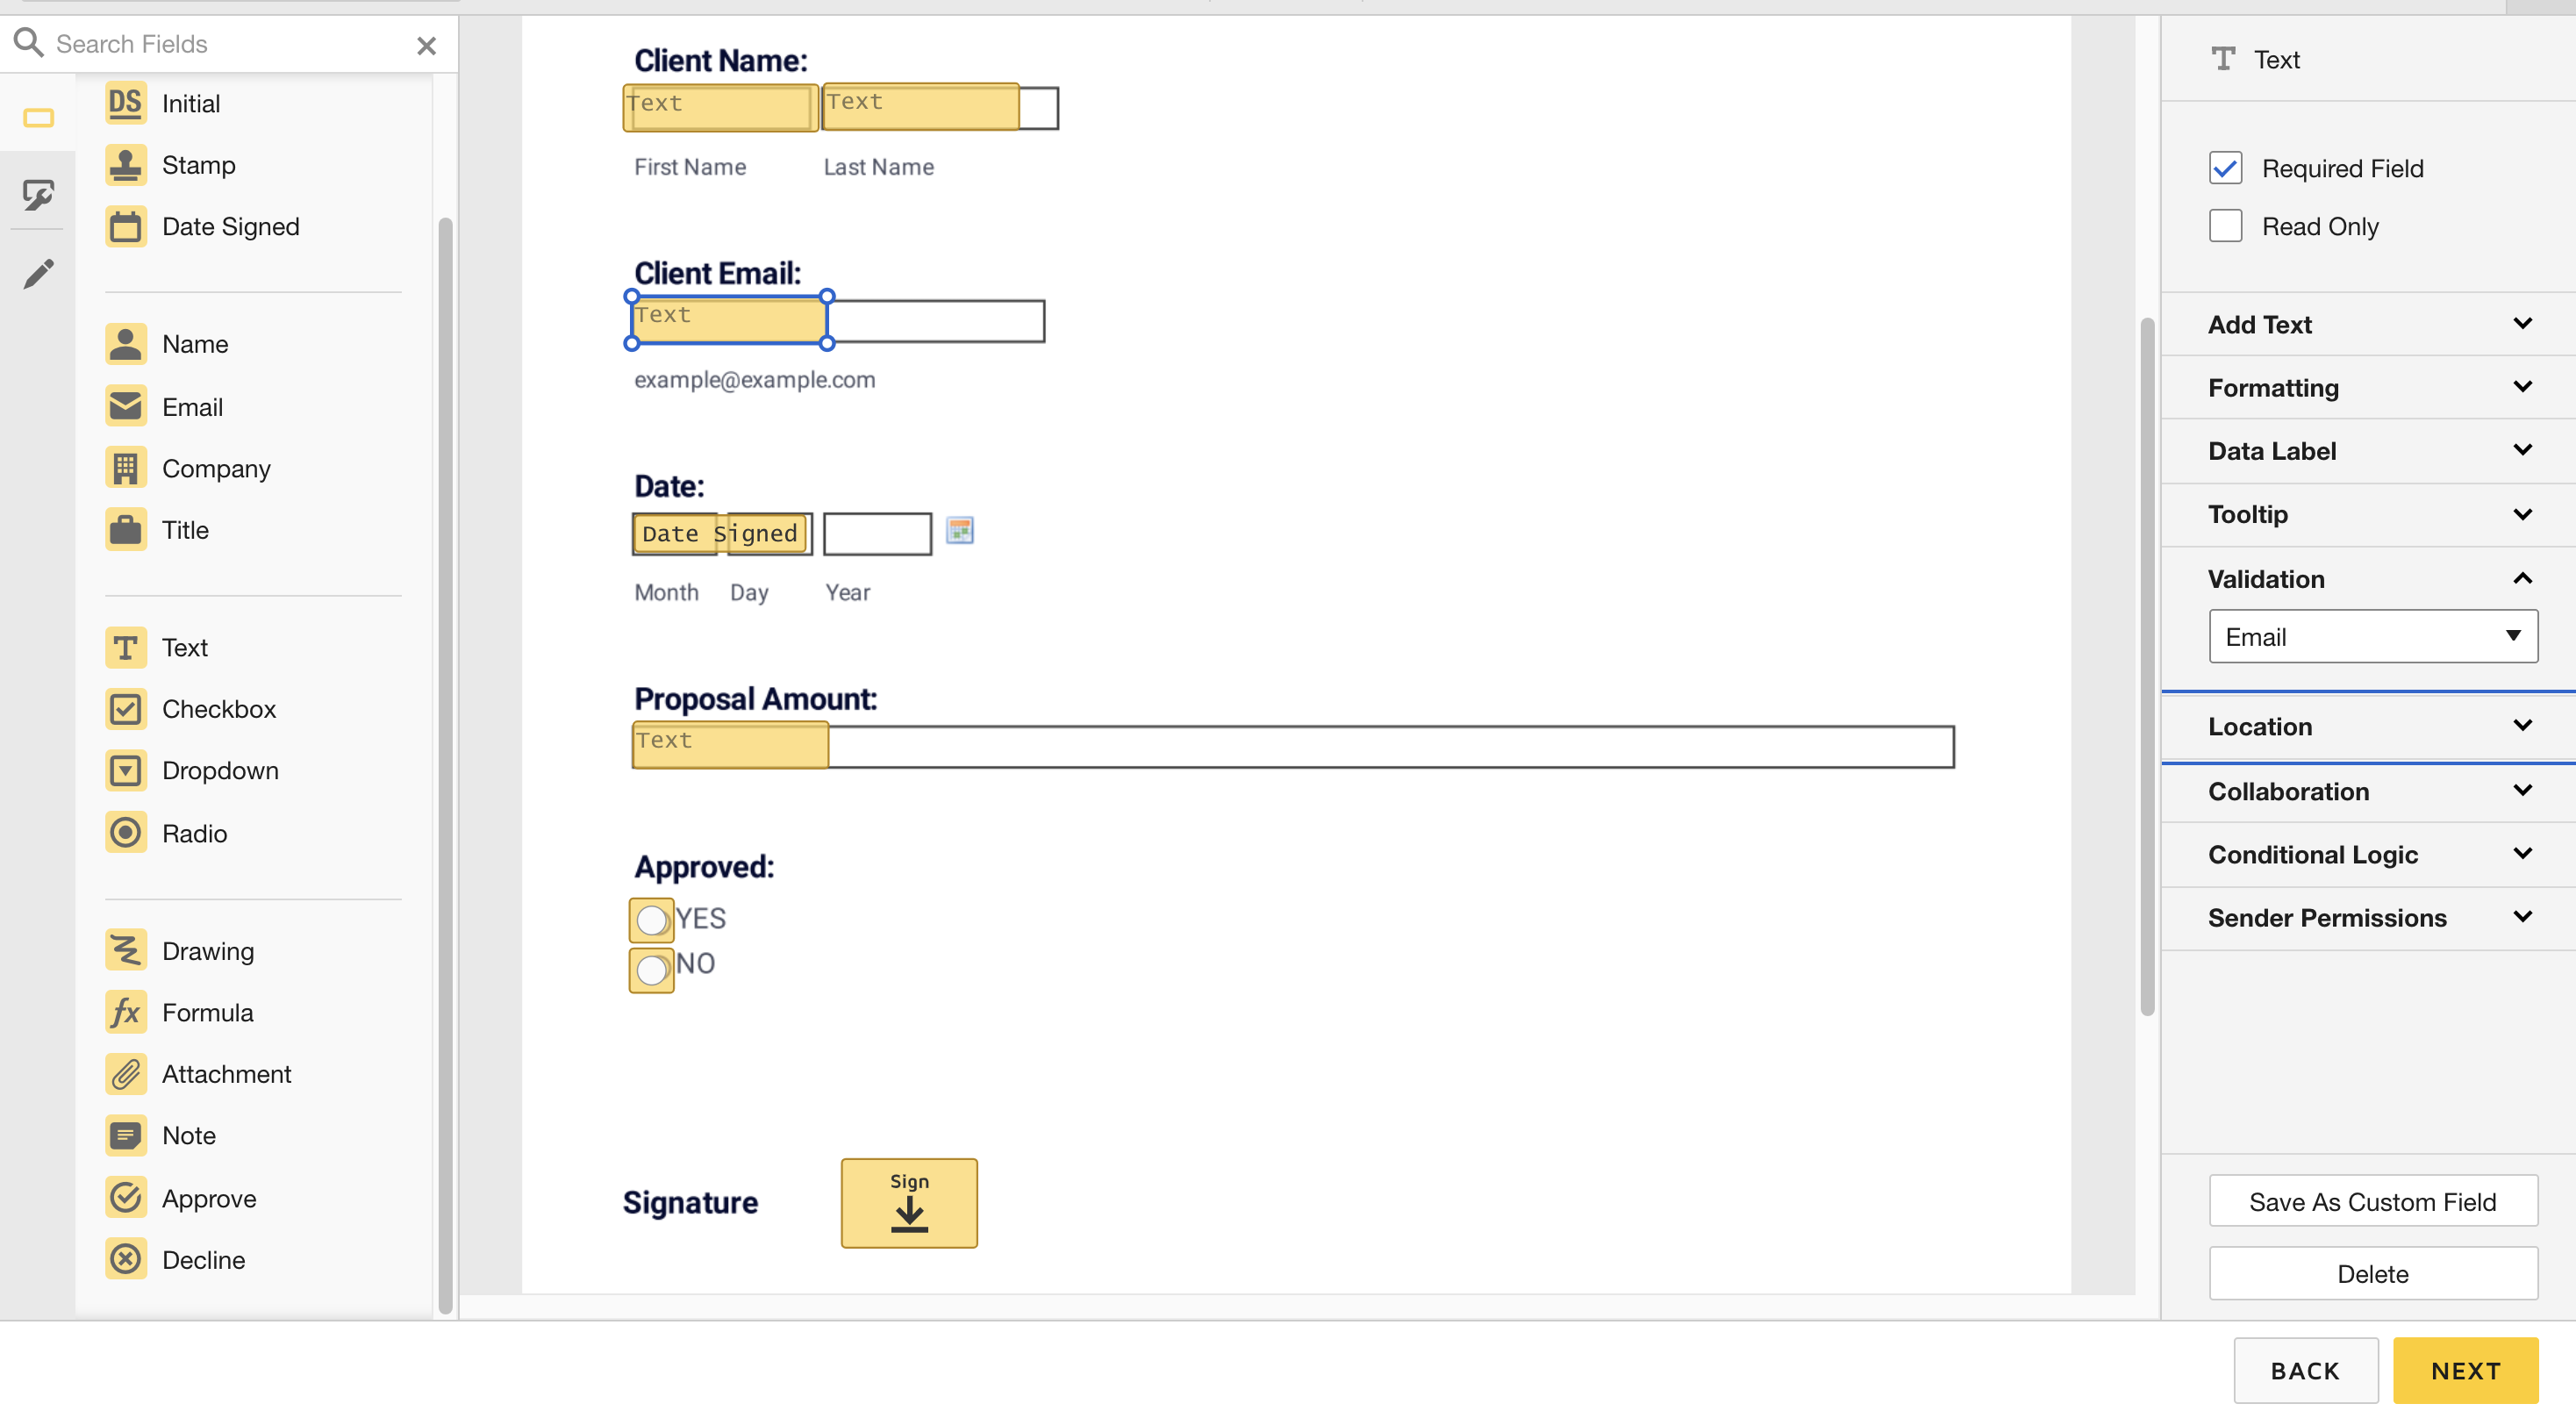
- If you haven’t already, prepare your template in HelloSign. See the HelloSign instructions on creating a template here . When setting up your template in HelloSign, you will need to make sure that the form fields you want are in the template, especially the signature field. See the example below:
-
Add an action to you Zap after the Catch Hook step. Choose “Send Signature Request From Template in HelloSign” and press “Continue”. Log in to your HelloSign account, continue, and select your template from the dropdown. Note - if you signed up for HelloSign using a Google or Dropbox account, make sure to set your password under settings or else you won’t be able to connect it to Zapier.
-
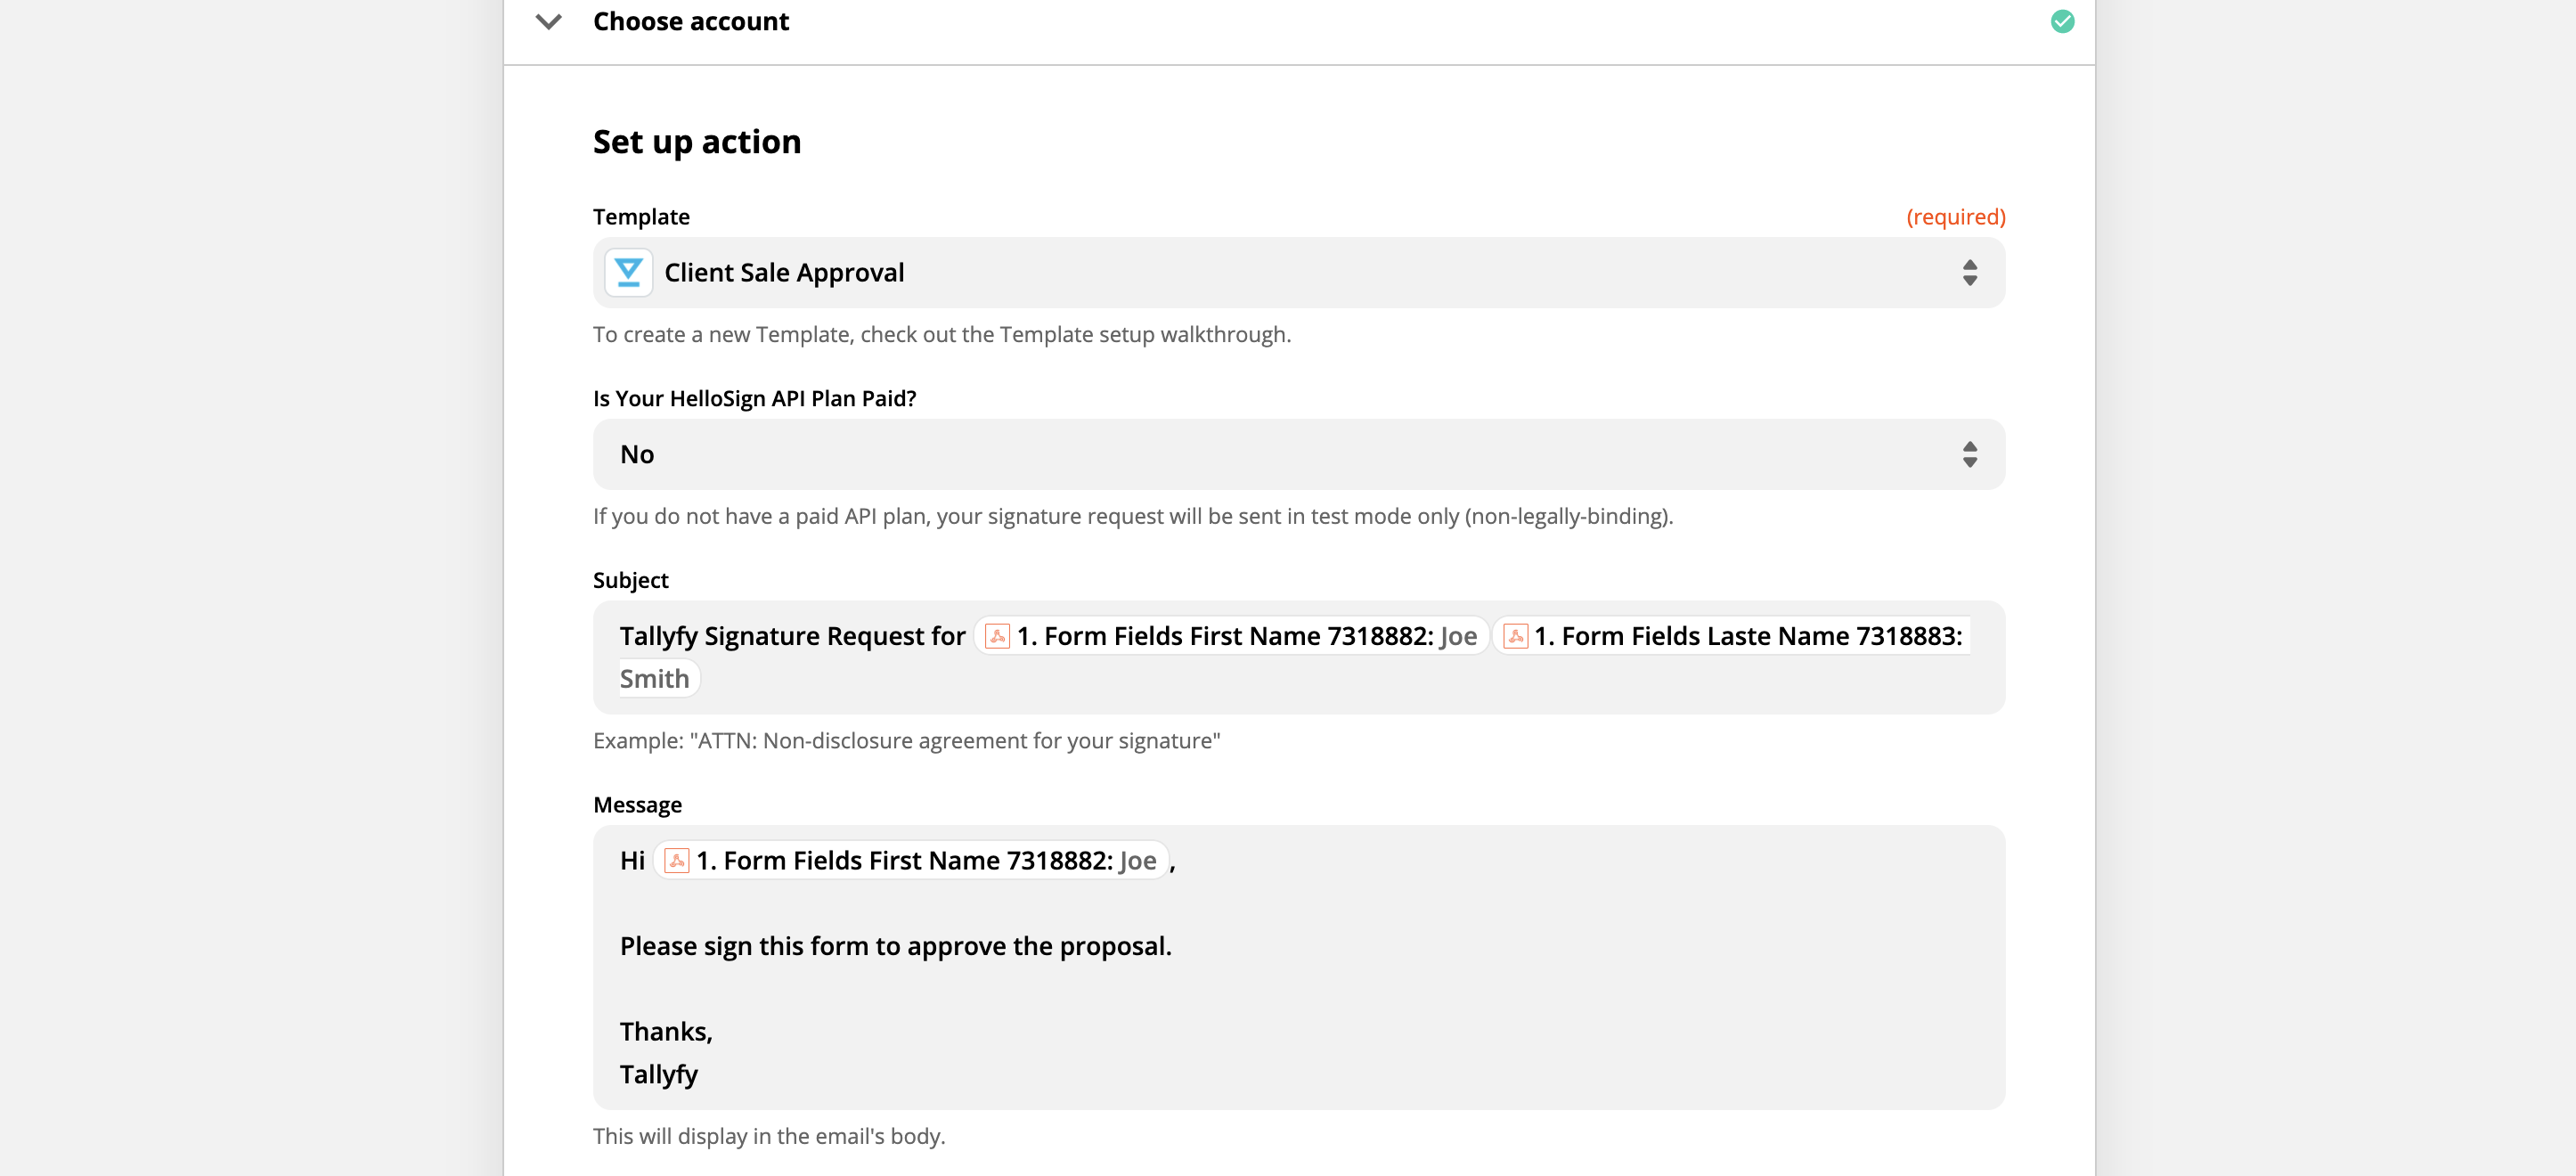
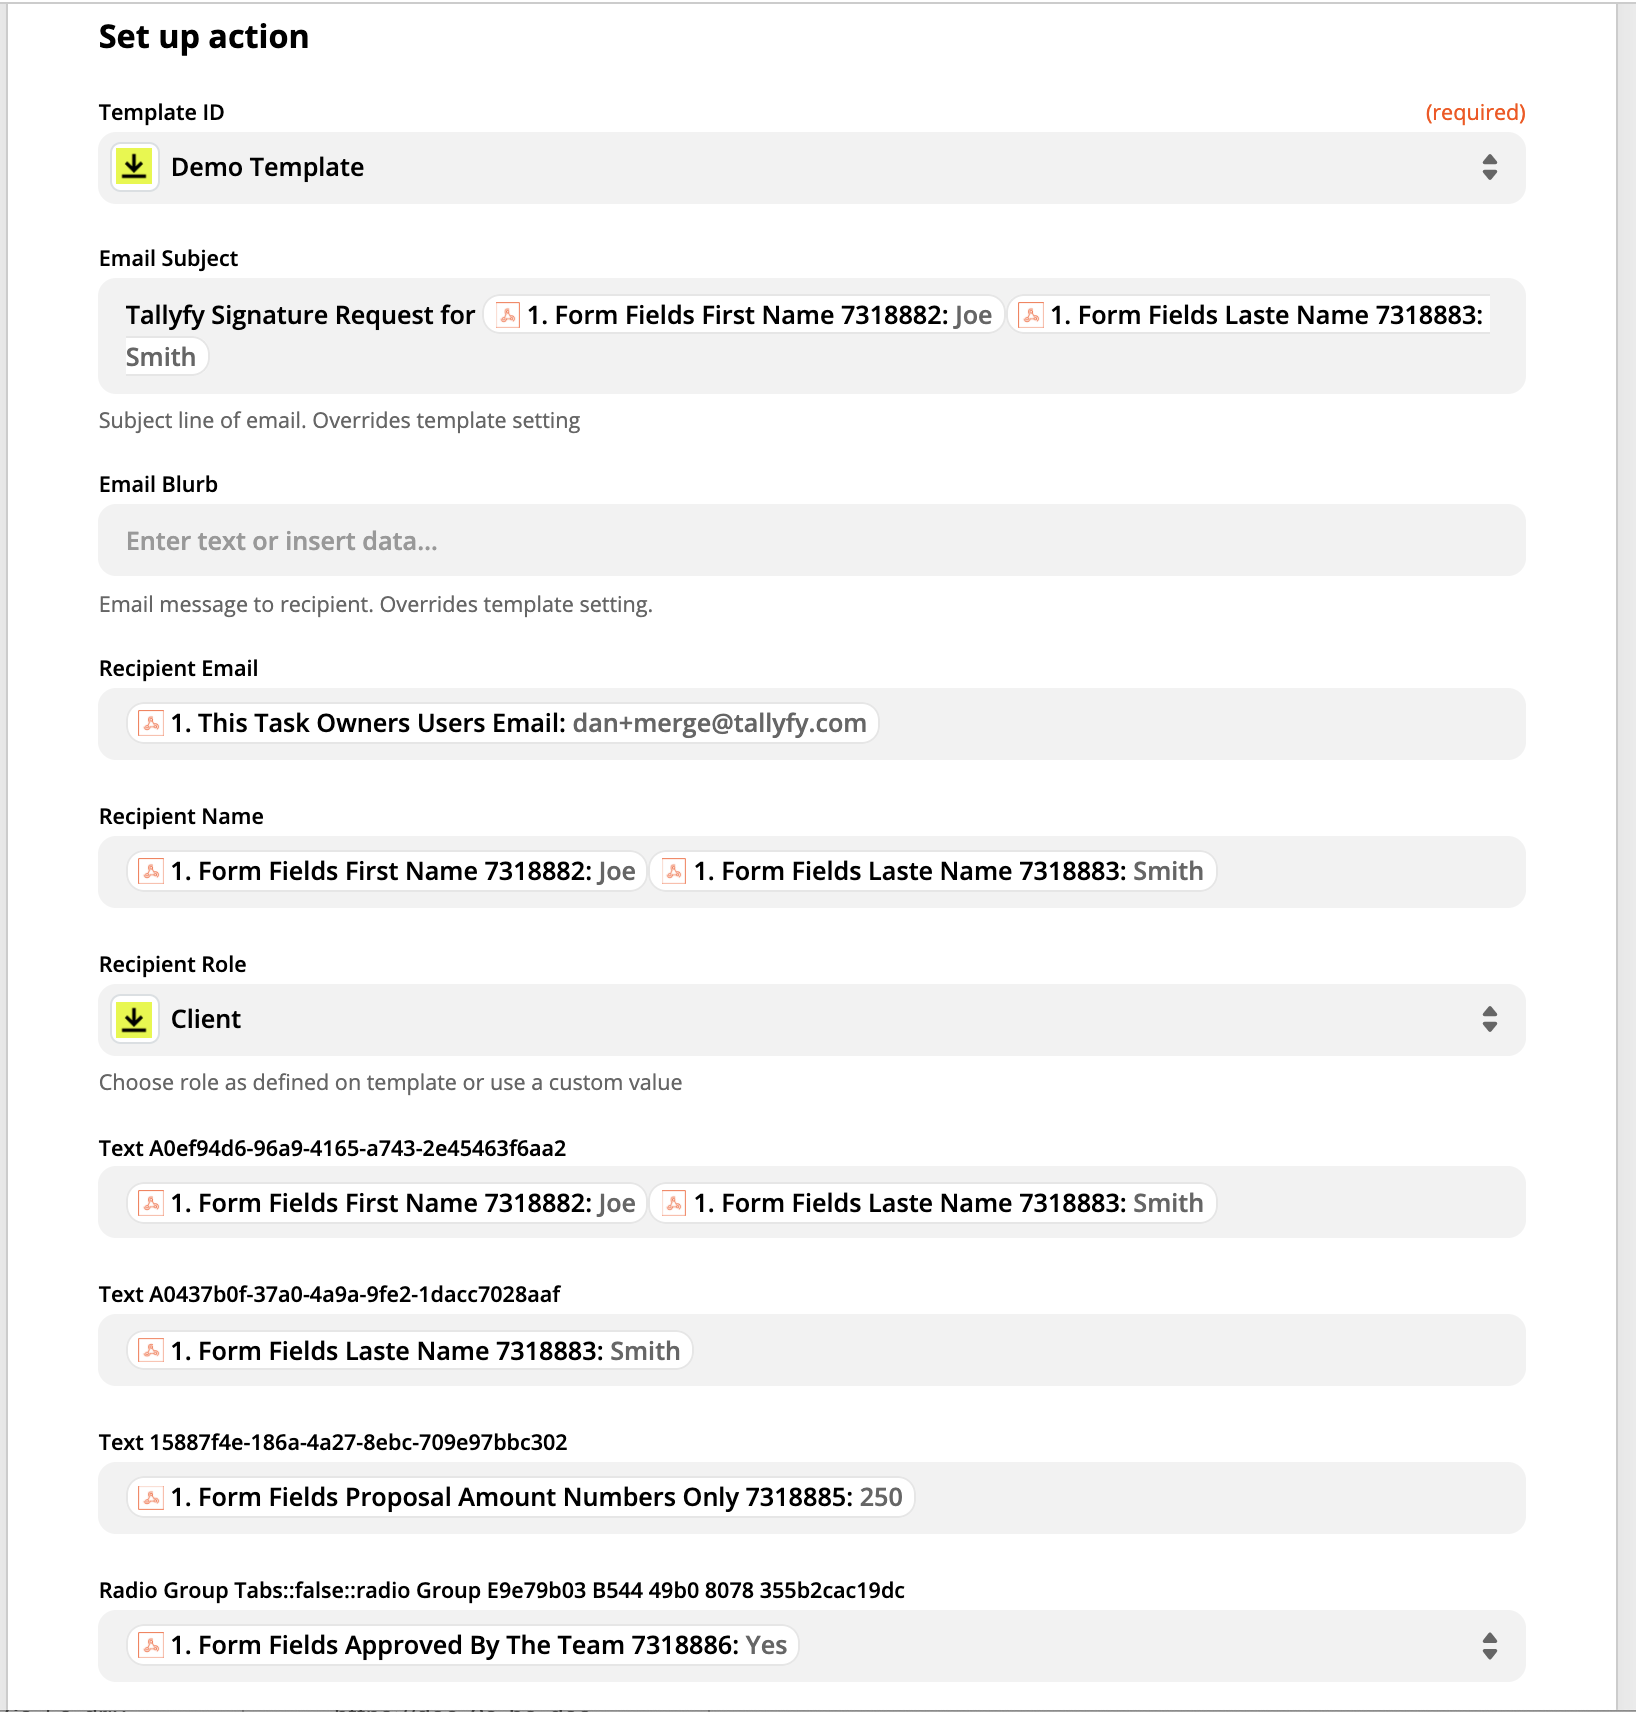
Add information from your webhook where needed. See below for an example of how to use the information from the webhook:
- Once everything is set up, test the Zap and turn it on. Now whenever you launch your Tallyfy process and get to a specific step, it will send a signature request using the selected HelloSign template.
For DocuSign
- Go ahead and, prepare your template in DocuSign, if you haven’t alrleady. See the DocuSign instructions on creating a template here . When setting up your template in DocuSign, you will need to make sure that the form fields you want are in the template, especially the signature field. See the example below:
-
Add an action to your Zap after the Catch Hook step. Choose “Create Signature Request in DocuSign” and press “Continue”. Log in to your DocuSign Account, continue, and select your template from the dropdown.
-
Add information from your webhook where needed. With DocuSign you can add specific field values to your document before sending it. The code or identifier of those fields can be found while editing your template in DocuSign. Below is an example of how to use the information from the webhook:
- Once everything is set up, test the Zap and turn it on. Now whenever you launch your Tallyfy process and get to a certain step, it will send a signature request using the selected DocuSign template.
How do I know a document has been signed so that I can auto-complete a task on Tallyfy?
Whenever a task is completed in Tallyfy, a signature request will be sent to the client through your chosen eSignature service.
To know when a document has been signed and automatically complete a task in Tallyfy, you’ll need to set up a middleware system like Zapier or Power Automate. This system will listen for the completion event from the signing service and trigger the “Mark task complete” action in Tallyfy.
To mark a task complete - you need the task ID, process ID - and of course, your organization ID, but the organization ID never changes for a single company.