How to edit steps in a template
Editing steps is fairly straightforward, we will take a look at how to add and edit existing steps into a template.
Add a new step
To add a new step to a template, simply scroll down through the step list until you find the Add Step option. Just name your new step and that’s it!

Editing steps
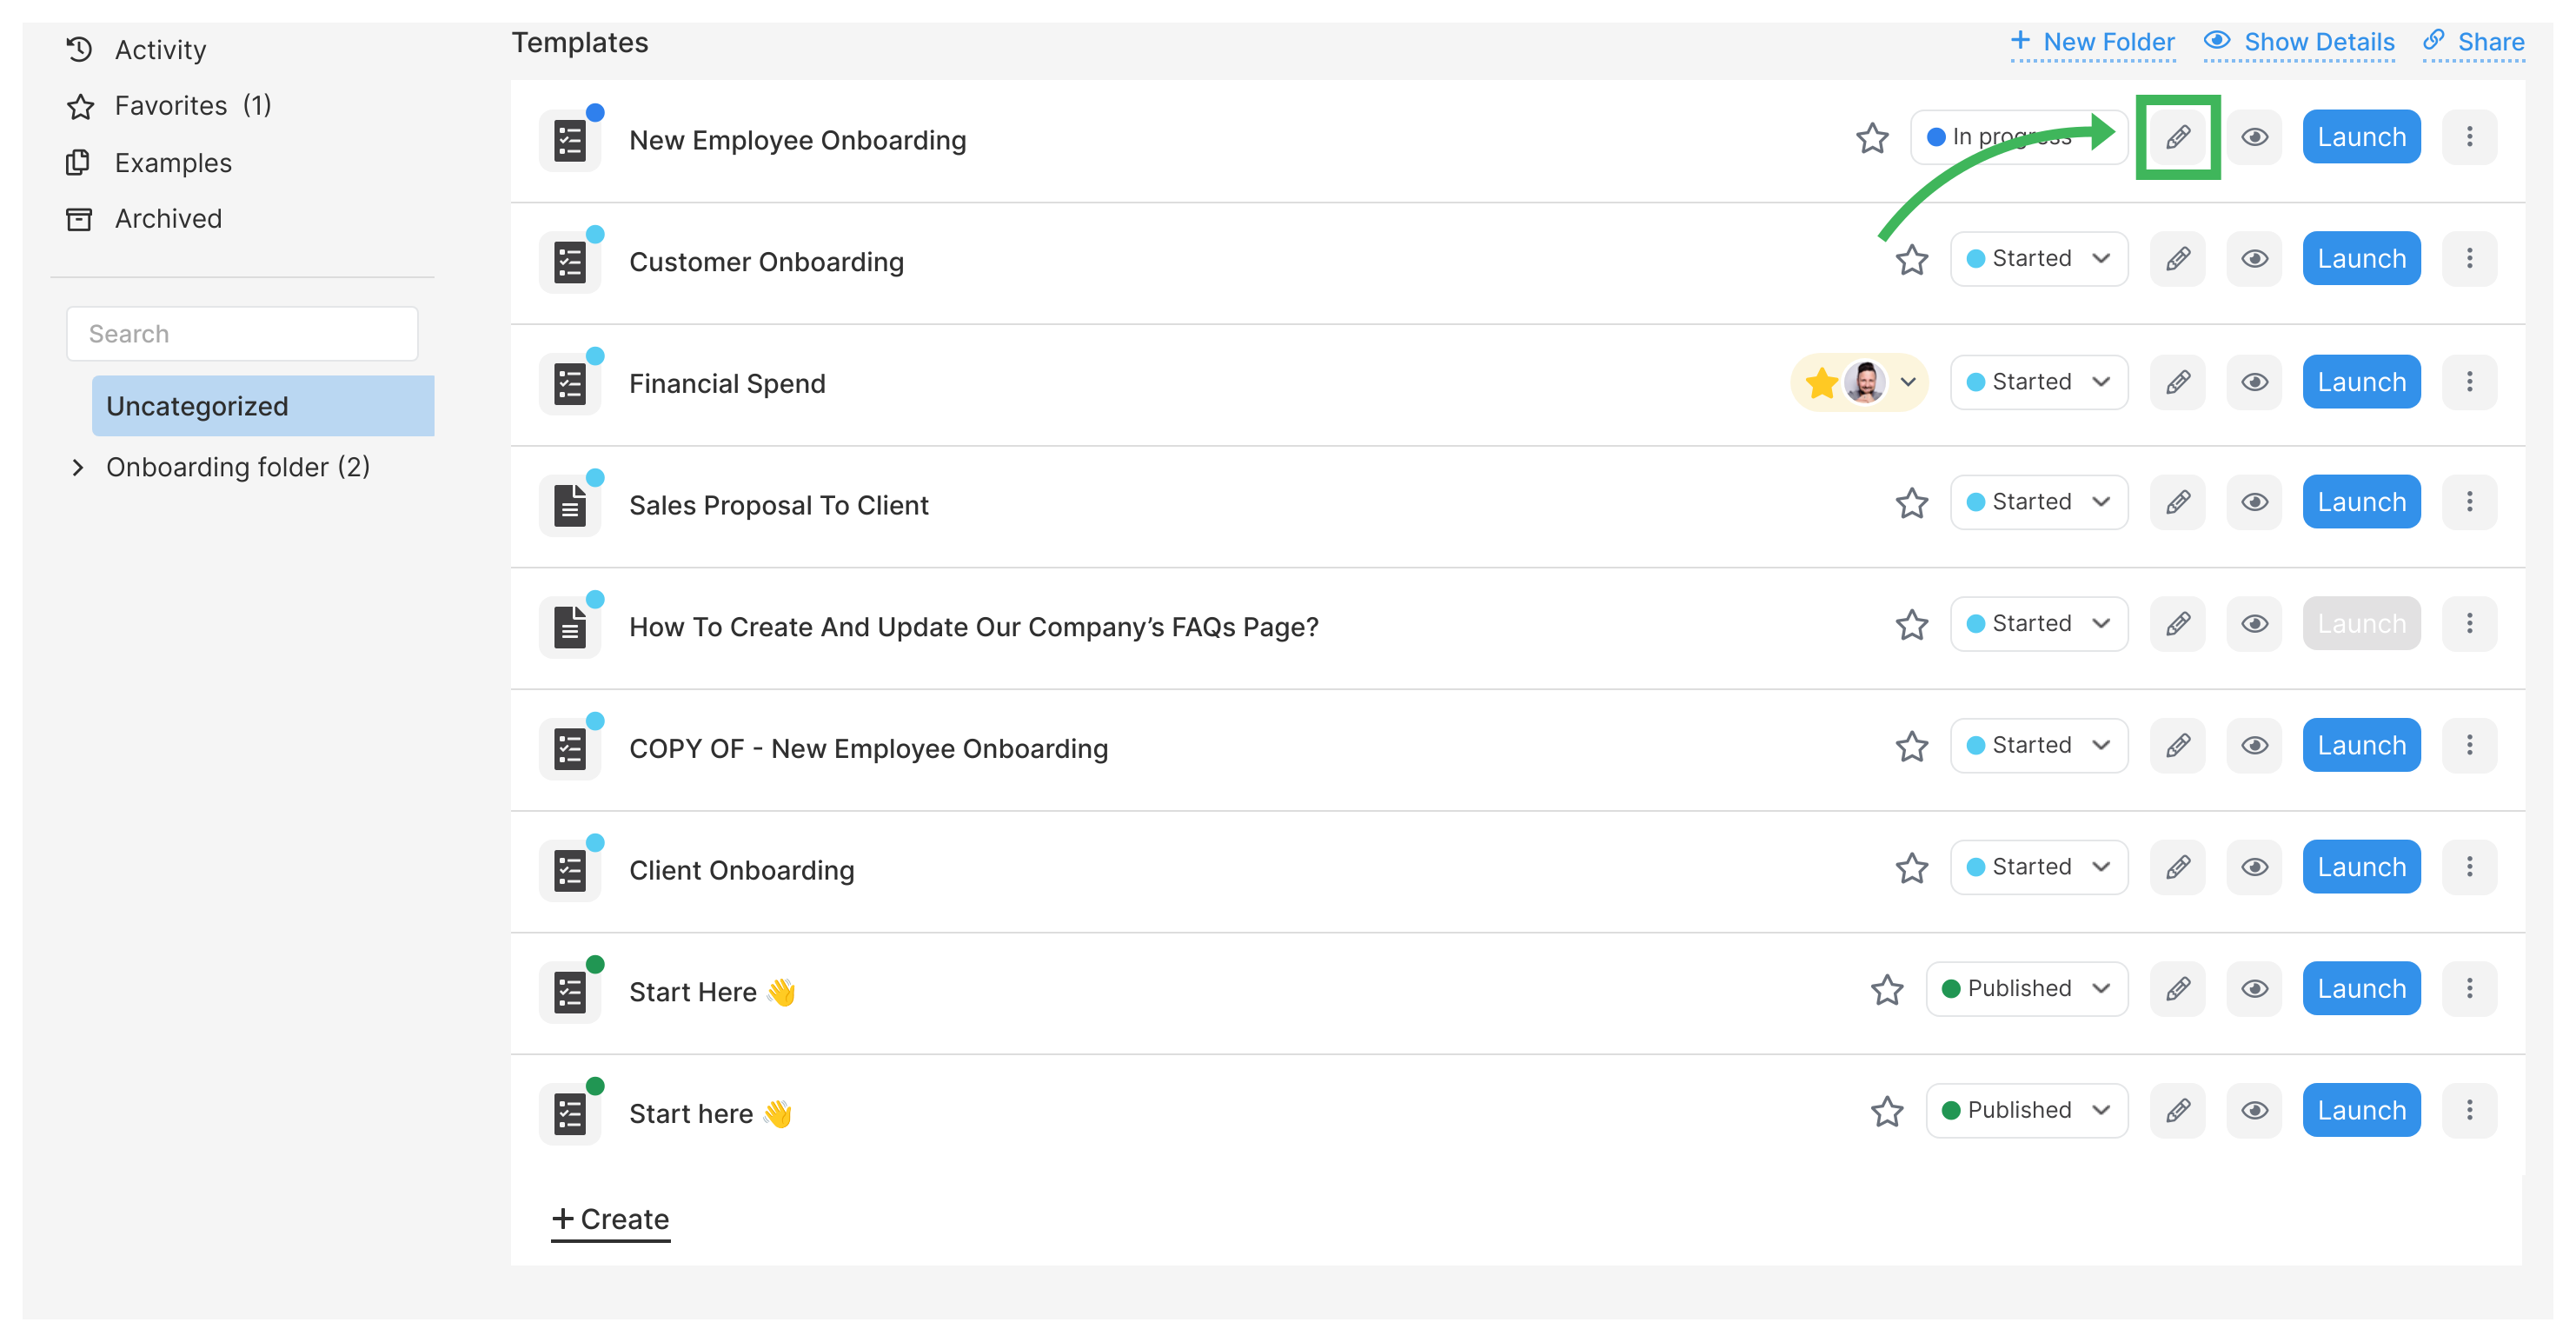
To edit any step, we’ll have to start by getting to the edit view in our template.
- From the sidebar, select the Templates option.
- Once there, select the Edit option in the template you want to modify or add a step.
With that out of the way, let’s explore what can we change in a template’s steps.
Editing/adding a description to a step
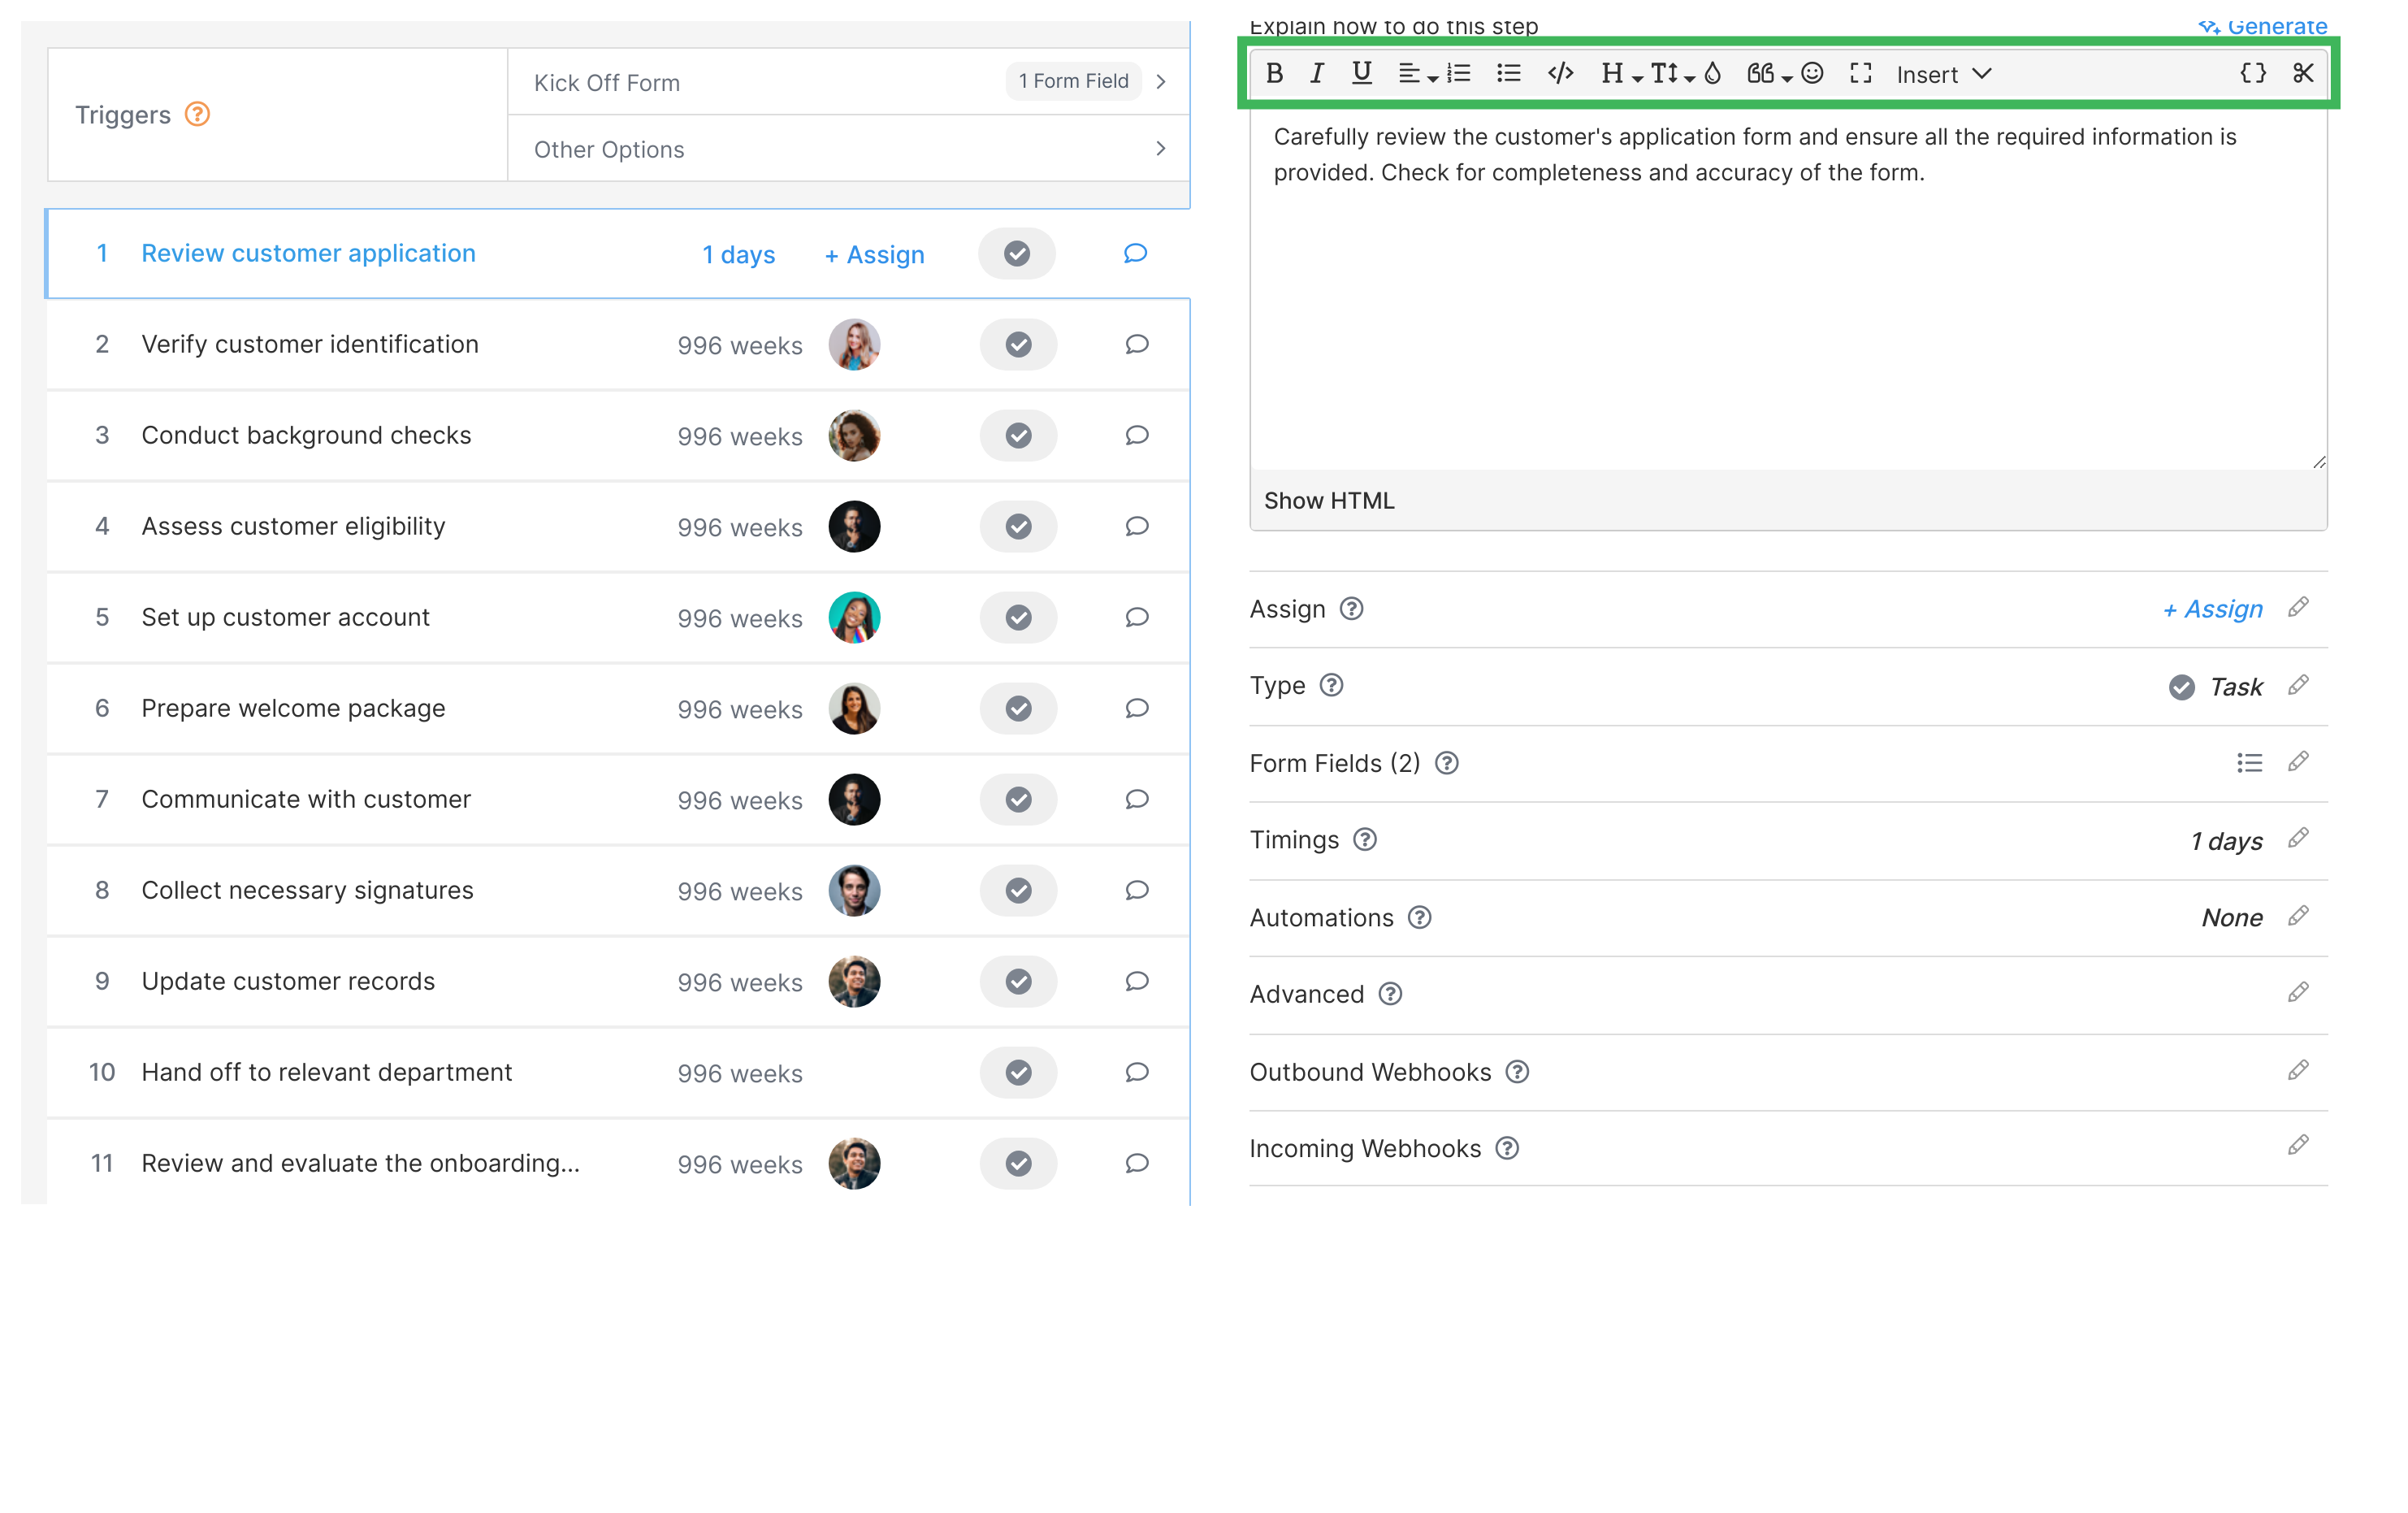
The description in any step is a representation of the task that needs to be completed. It can include images, files, URLs, tables, and videos, as well as any variable or snippet of your choice. To start adding a description to your step:
- Click on the specific step you want to edit and select the Description option.
- You’ll be greeted with a rich text editor that allows you to format your text in any way you want.
- Your changes will be saved automatically.
Assigning/ Re-assigning steps
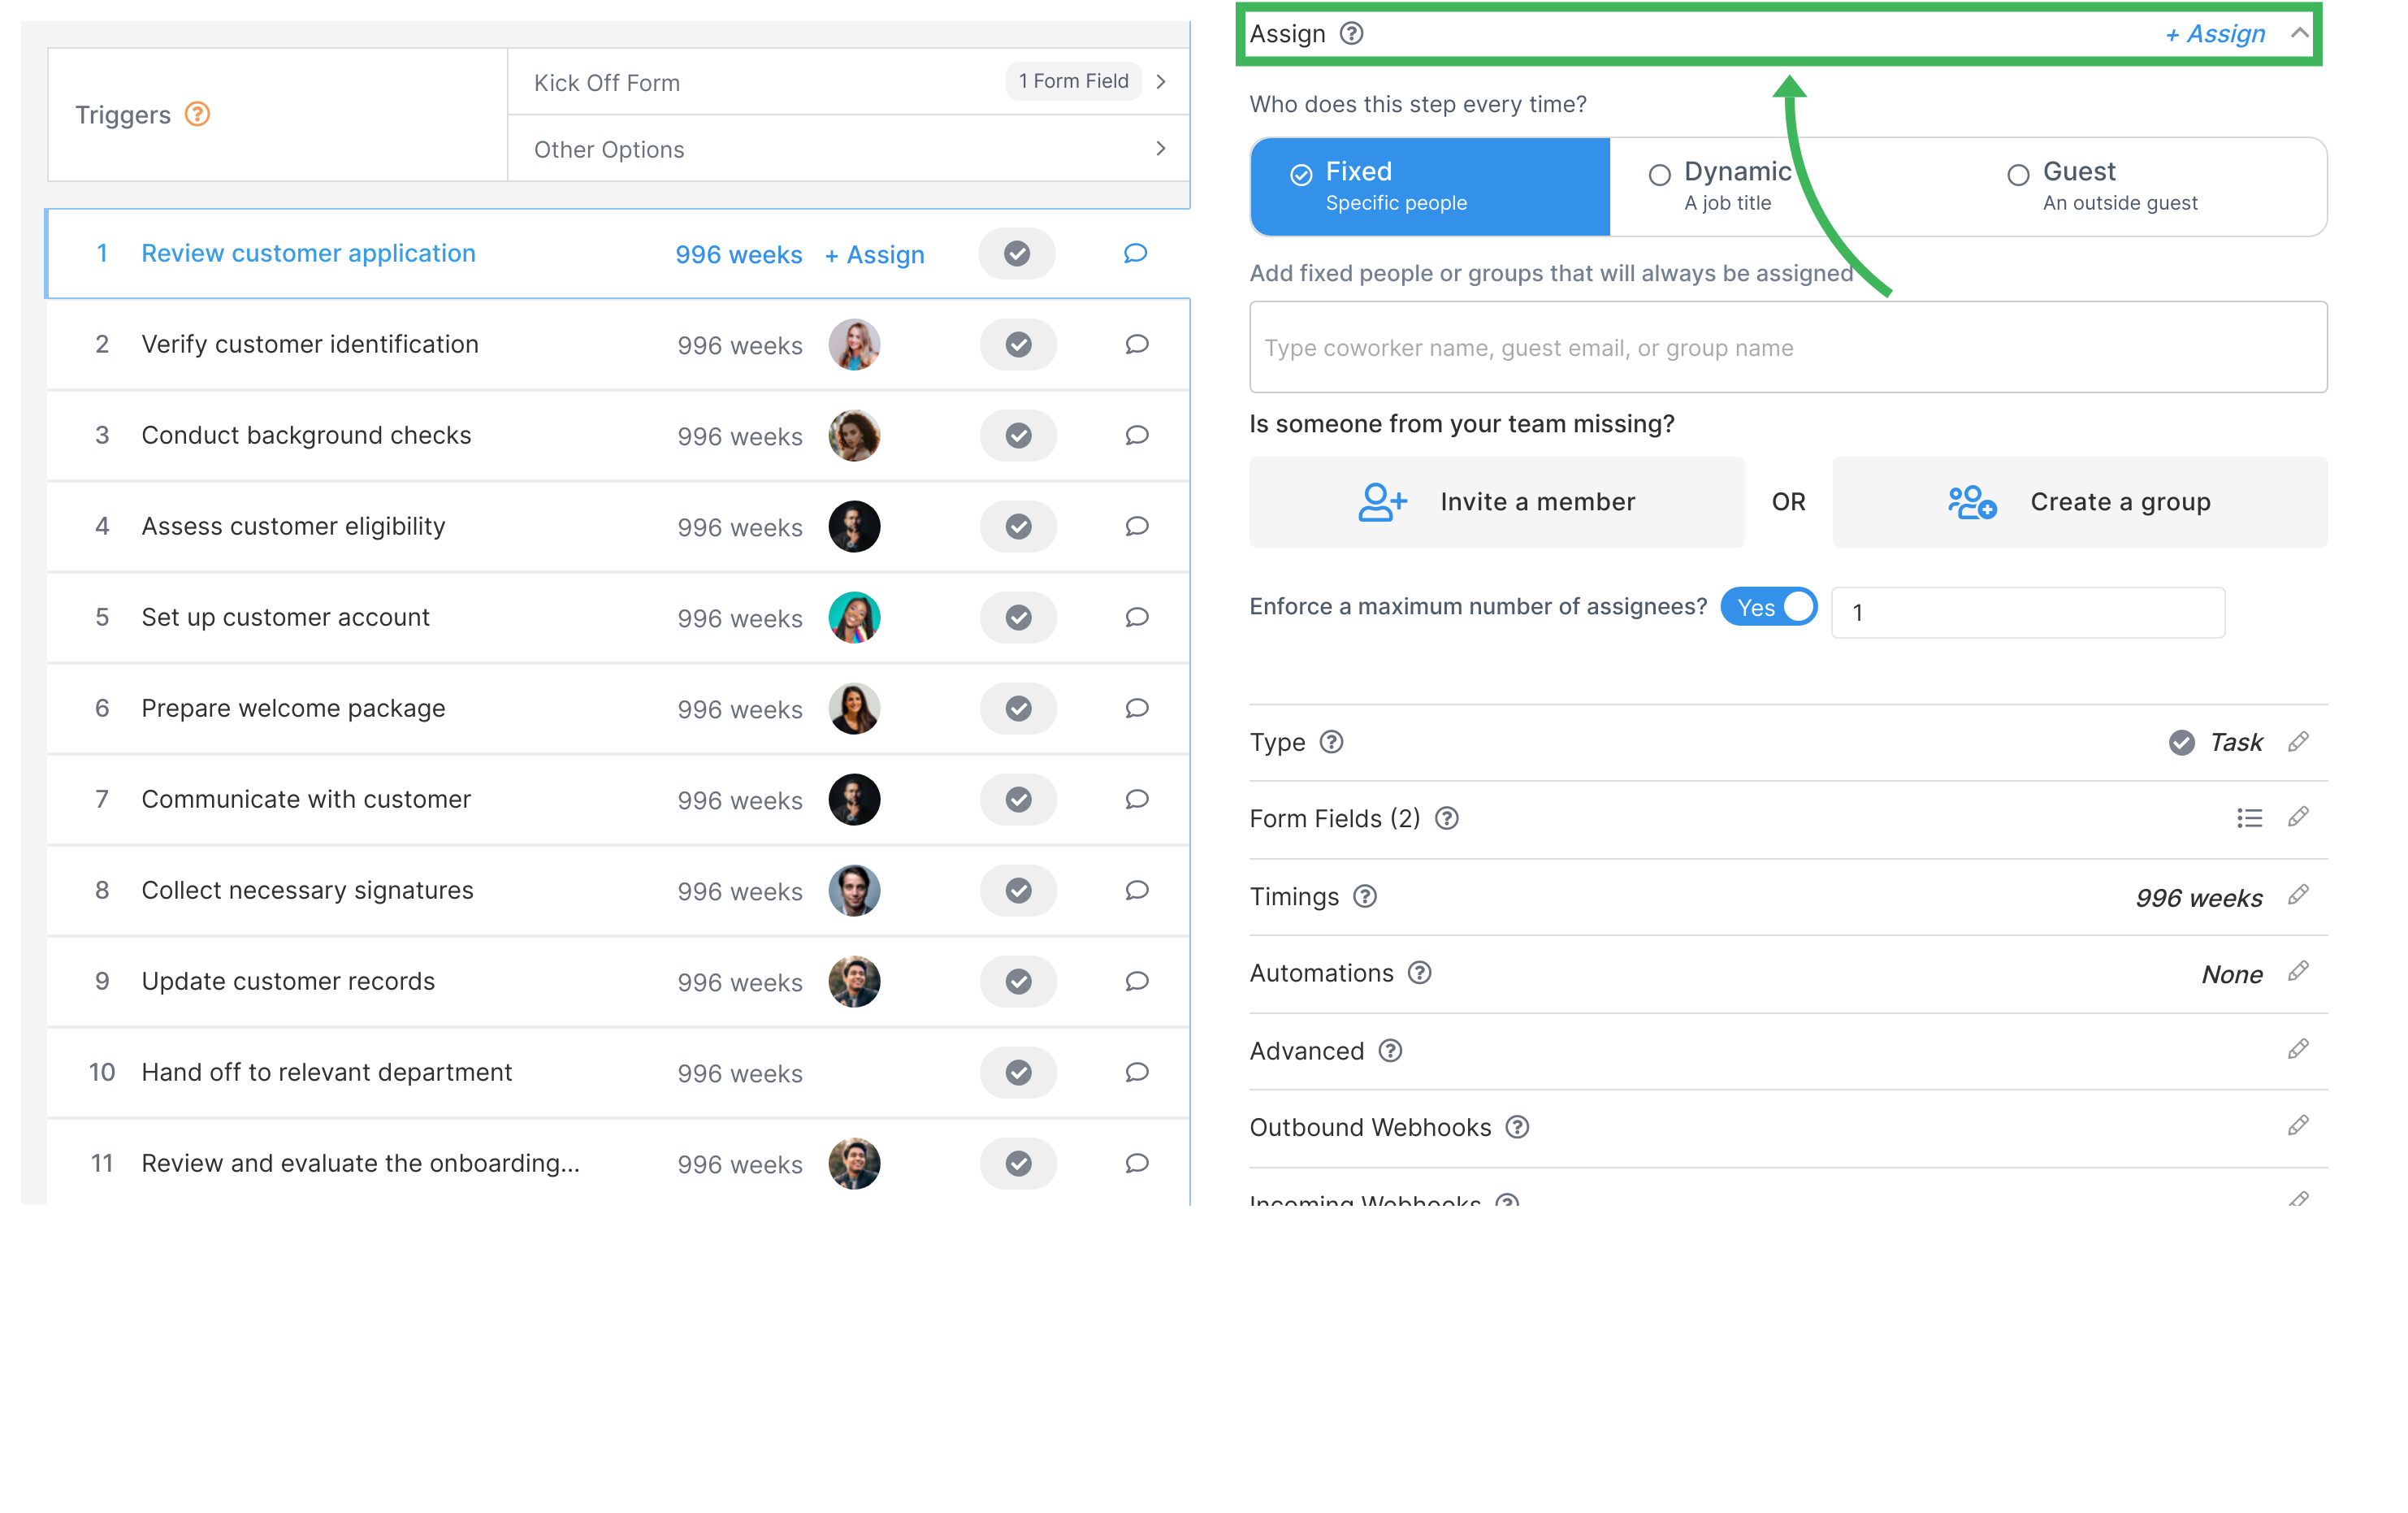
Tallyfy allows you to assign either a coworker, a group of people, or even a guest to any step by default. Simply follow the next steps:
- Click on the specific step you want to edit and select the Assign option.
- You can then add or remove any assignee of your choice by simply typing its name or email in the case of assigning a guest.
- You can check the “enforce a maximum number of assignees?" to establish a maximum number of assignees in a step
Changing the type of step
To change the type of a step:
- Click on the specific step you want to edit and simply click on Type, this will drop a menu where you can select the type of task you want that step to be.
Add/change form fields
You can change or add a form field by following these steps:
- Click on the specific step and then select the Form fields options.
- You can then select the form field you want to edit, or click on Add field to add a new form field to your step.
For a detailed explanation of form fields and how can they be useful for your processes, go to this article.
Change the timings/deadline of a step
To allow you full control over a step deadline, you can set up how many time before/after launch or before/after a specific step has been completed.
- Just simply click on your step, and then select the Timings option.
- In this menu, you can set up the deadline as you want to. By default, every step’s deadline is started after launching the process, however, you can set it up so that the deadline for a task starts once a process has been completed by simply selecting N > time > after > Step2: Completed.
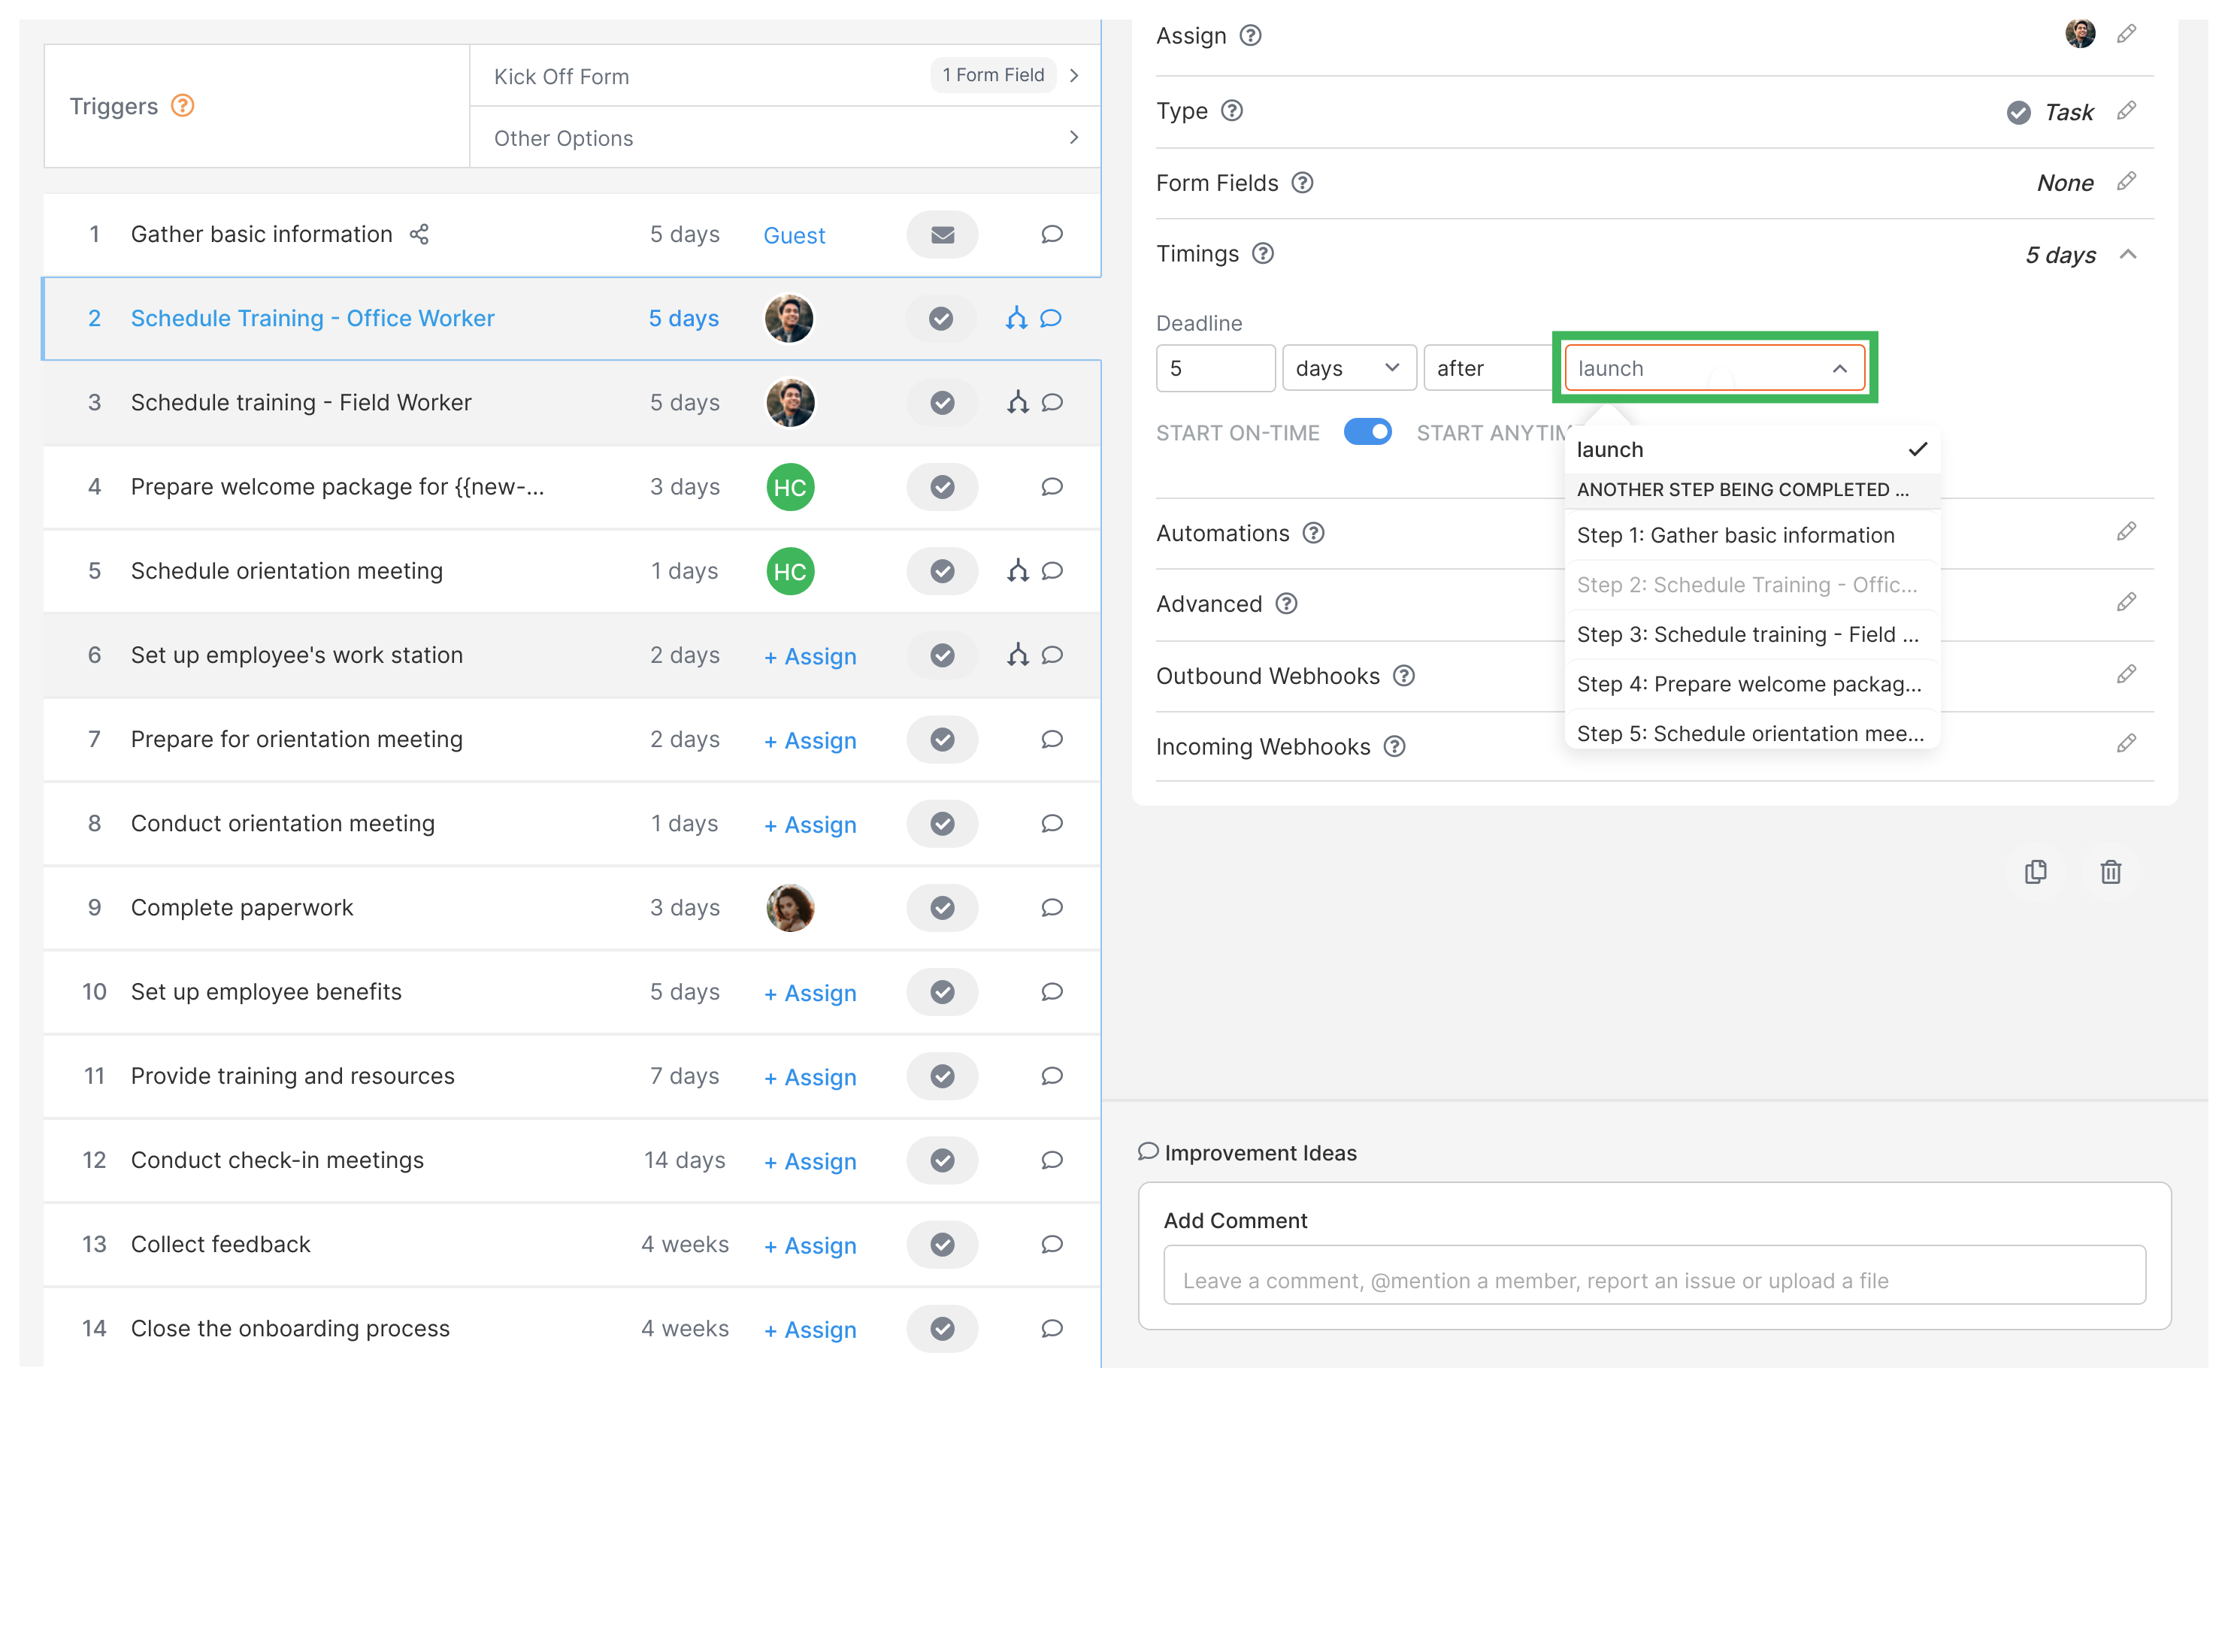
- Additionally, you can specify if you want a step to begin after a certain amount of time before the deadline by hitting the switch at the bottom.
Advanced settings
Tallyfy allows for advanced customization in your steps. Here’s a brief explanation of every option we provide.
- Launch another process when this task is complete: By selecting this option, you can launch a process when the step is completed. Once selected, you may specify the process you want to launch that Doesn’t have a REQUIRED kick-off form, whether or not you want to inject(add) the tasks of the selected template to be launched into the current process, or not, and if you want to specify the name of the process or not. (By default, it will be the date and time, and the name of the template). We have a dedicated article on this process, just follow this link.
-
All assignees must complete this task: This will ensure that the task won’t be considered as complete until every assignee completes it.
-
Task is mandatory and cannot be removed at launch: If selected, it will make the task unable to be removed from the process and it will be mandatory to complete.
-
Only assigned members can complete this task: If selected, only assigned members will be able to complete the task. (This will exclude administrator users too)
-
Prevent guests from making or seeing comments: If selected, any guest assigned to a task won’t be able to comment on it.
-
Tags: This is an optional field, where you can select a series of tags to better organize your templates and processes.